Saturday, August 1, 2009

Big IHP News!

I just got in this morning from CHA (didn't get home until about 2am). I had a great time and saw LOTS of great new stuff that Kate will be stocking at i {heart} papers soon! And I finally got to meet some of the IHP Design Team in person — what an amazingly great bunch of ladies!

Today is a BIG day here at IHP. We’re making some changes and welcoming some new faces and I am beyond excited.

First, please join me in welcoming Gretchen and Megan to the core IHP DT. They are both amazing stampers and I am so thrilled they will be part of the IHP team.

The next piece of exciting news is that IHP will be launching the first of their new, exclusive stamp lines this month, by Jannie Ho of Chickengirl Design. How exciting is that!?! There will be a whole design team to cover this line and we're happy to welcome Natasha and Shelly to this new IHP DT! Natasha and Shelly have the perfect style for these adorable stamps and we're so excited to have them on board.

Two of Jannie’s sets will be released this month and we’ve got some other illustrators working on different sets (each illustrator has a completely different style so you’re sure to find something you love!). There are even sets in production right now! These sets are made of the highest quality photopolymer, made in the USA by the same top manufacturer in the industry who makes a lot of your other favorite stamps.

With this news also comes a bit of a restructuring of the current DT. Merry and Lori will be transitioning to new Chickengirl stamp team. Releases will not be every month, so on "off" months all of these folks will be doing business as usual here at IHP.

And, to help us with this release we’ve got some very special Chickengirl Design guest stampers; please be sure to visit them so you don’t miss anything!

Judy
Shannon
Tammy
Kendra
Loretta

There will be some sneak peeks of the new stamp line starting tomorrow, and on the 9th will be the full reveal. Be sure to check the DT blogs so you don’t miss a single thing!

My other bit of big news is the launch of our new newsletter to make sure you’re up-to-date on what’s going on here with releases, new products, SALES, COUPONS, and other good stuff. I am proud to be taking on the role of Editor for this. I’ll still be stamping of course (just try to stop me!), but my primary focus for IHP will be on the newsletter.

If you’ve ordered in the past you will automatically get the first issue. If you don’t want it, you can easily unsubscribe. If you’ve never ordered but would like to subscribe, just leave a comment with your e-mail or head over to the IHP website and sign up!


Tuesday, July 28, 2009

IHP Challenge: Wide Ribbon (oh, and a contest!)

Now, I love ribbon as much as anyone else. I’ve been accused of being a ribbon junkie (and worse). But wide ribbon has always been a bit of a challenge for me, so when the i {heart} papers Design Team came up with this month’s challenge of using wide ribbon, it struck a little bit of fear into my heart. Until I came up with this:

wide-ribbon-rose-bo

Is that not the most delicious looking ribbon? It’s hard to tell, but the ribbon is satin in the center, and sheer on the edges. This whole card makes me think of chocolate covered cherries (but that’s just my warped mind).

That bow is deceptively simple. It’s really 2 pieces of ribbon. The back one is just a straight piece, notched at the ends. The looped part is just that – a loop of ribbon adhered with a bit of Mono Multi glue. All I did to make the bow was put the loop on top of the notched piece, gather it up in the center with my fingers, and wrapped the 3 wired rose buds around the two pieces to hold them together! Once they are wrapped, it’s very easy to adjust the individual pieces to make them even. The whole thing is attached to the card with a couple of glue dots. How simple is that?!!!

Of course we’d like you to join the challenge with us, but this month we’re stepping it up a bit. Our Challenge Coordinator, Deb Felts, has decided to make a CONTEST out of this month’s challenge. Go to her blog to get all the details. There’s a mighty fine prize involved! And check out the rest of the design team to see who rose to the challenge.

What I used:
Stamps: Flowers For You
Ink: Palette Noir, Copic markers
Paper: Chocolate Chip, Real Red, PTI White
Other: Nestabilities, Cuttlebug embossing folder, 1-1/2” Brown Satin-center ribbon, Wire-stemmed flowers

Saturday, July 25, 2009

Variations on a Theme

I find so much inspiration in the (over 300) blogs that I follow in my Google Reader, and so when I stumbled across this blog entry by Tracy, I couldn’t wait to sit down and make a couple of these cards myself.

topnote-butterfly-wisteria topnote-butterfly-marrakech

They are obviously made the exact same way, using a different assortment of papers and accessories for each. The patterned papers, available at i {heart} papers, are from the Wisteria and Marrakech 6” pads by Basic Grey, respectively. The top card uses some adhesive pearls and a greeting from the Happy Greetings stamp set, and the bottom one some adhesive Zva bling dots.

The Top Note die and butterfly die are from Stampin’ Up!, as is the ribbon, the solid cardstock, and the rub-on I used for the blue card.

These cards are a great way to use up those scraps of patterned paper that I know you have laying around. I cut mine 1-1/4” wide, if you’re interested in trying it yourself. I adhered them to a piece of lightweight cardstock and then ran them through the machine with the die. 6” strips of paper will provide you with enough for 2 of these pieces. Then I trimmed them and adhered them to a solid die-cut shape, and tied it up with a ribbon. There may be another way of doing this, but that’s how I did mine.

Hope your day is full of inspiration!

CMsignature

Saturday, July 18, 2009

Carried Away

As I mentioned last weekend, I’m taking one of Jessica Sprague’s free online photo editing courses called Frame-Ups and Special Effects. The way she lays out the classes is terrific. This lesson uses textures and text. And as promised, I have a photo from my son’s beach wedding this past Spring. Aren’t they lovely? I just had to share.

carried-away-smallCMsignature

Thursday, July 16, 2009

Happy Birthday, Kate!

Today is my dear friend Kate's birthday, and at this moment she is on her way up to Niagara Falls to celebrate. Since I know she received my card in the mail yesterday, it's safe to show it to you now.
Of course, I wanted to use things she sells in her store for her card, but I HAD to use my beautiful Sweet Pea set (Flourishes) for the image. I chose the paper first, and chose my Copic markers to coordinate. I used some of the lovely embroidered ribbon to center the image on, and I airbrushed some adhesive pearls with one of the Copics to pull it all together. The greeting is from the Happy Greetings set. I've been using that one a LOT lately, and it's on sale right now at i {heart} papers!

Just remember that although you can place your orders at any time, she won't be shipping anything out until she returns on July 23rd.


Sunday, July 12, 2009

More photo editing exercises

I am totally loving working with Photoshop Elements and will have to break down and buy the real thing before my free trial runs out. This pic was an exercise from lesson 5 about using textures. I used a photo I took a few years ago when my sister and I went out to the North Fork of Long Island to visit some wineries. I think it was in October, so the colors weren’t too vibrant anyway, but I took down the saturation a bit to make it look just a little bleaker. There are actually 3 different textures used here. Then I added a mask for the edges, the frame (which is really a brush), and some text, using some of the previous lessons. I love it!

CMsignature

Saturday, July 11, 2009

Fun with Photos

I signed up to take one of Jessica Sprague’s free photo editing classes, which started this past Monday. Unfortunately, I’ve been so busy during the day at work, and so tired when I get home, that I just got to sit down and start the classes this morning. And what I realized is that the versions of Photoshop CS and Photoshop Elements that I have on my computer are too old. Like REALLY old. So I spent the better part of the day fighting with my computer to download a free trial version of Elements 7. But now that that’s done, I am learning so much!

Now, keep in mind that I didn’t actually take either of these photos. The first one, well I don’t even know who took it; the second one was a from a professional engagement photo shoot. But the girls are mine — my two gorgeous daughters.

lesson1-AnnisaB&W

This is my “baby” Annisa, who just turned 29 this week, although the picture was taken a couple of years ago. The photo itself was kinda blurry to begin with, but it’s such a great shot of her, and it totally went with the Word Art that was part of the lesson. This lesson was about using Frames and Word Art.

lesson2-Laila-Roy

This is my other daughter, Laila, and her husband Roy. As I said, this was taken about a year and a half ago for their engagement shoot. This lesson was about using Photoshop Brushes, and I added the text.

Now I need to find a picture of my son and his wife for my next lesson…

CMsignature

Thursday, July 9, 2009

Running a Fever?

This set cracks me up! I know that if I were ever sick, I’d get a kick out of getting a card like this. Fortunately, I don’t know anyone running a fever — but I’m ready!

This card qualifies and Clean & Simple, which is just how I like it these days. A little decorative scoring, a little Glossy Accents on thermometer, and that’s as fancy as it needs to be!

running-fever
What I used:
Stamps:
Running Sick (ON SALE now at i {heart} papers)
Ink:
Palette Noir, Copic markers
Paper: PTI White and Pure Poppy CS
Other: PTI Pure Poppy satin ribbon,
Nestabilities (also ON SALE!), Scor-it, Ranger Glossy Accents 
 CMsignature

Tuesday, June 30, 2009

Bling It On, Baby!

bling birthday start inset

This month the i {heart} papers Design Team’s Challenge was “Blingalicious” – a card (or project) with plenty of bling. Not a problem for me; bling and I have a long history, and I certainly have no shortage of sparkly stuff (thanks to Kate at IHP)!

As a New York City girl, I know that nothing goes better with bling than Basic Black. Add a pop of color, and you’re good to go. Tres chic!

bling-star-birthday

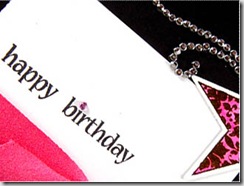
The base of this card is actually PTI white, but I covered the front panel with black and a strip of awesome, lightly textured GCD Venetian Lace paper, and then tied it with some sumptuous Light Fuchsia faux suede ribbon. The birthday greeting is from the adorable and VERY useful Happy Greetings stamp set (which, by the way, comes with its own bling, and is ON SALE right now for really cheap!). I just love the font on this set.

The star is from PTI’s Star Prints set. I stamped it with black, and then colored it with a Copic marker to match the ribbon. The bling, of course, is what makes the card super-special. It’s the ZVA Crystal Symmetrical Flourishes (small). I snipped off a stone left over from a previous project where I had cut apart the other flourish on the sheet, and colored it with the same Copic marker and used it to dot the “i” in birthday. Kate has loads of ZVA Bling in the store, so go check it out!

And go check out the rest of the IHP Design Team to see what they came up with for this Blingalicious Challenge:

And of course, KATE at the IHP Blog!

Carolyn

Saturday, June 27, 2009

Daniela's Shower

My daughters left for Italy last night to attend the wedding of their friend Daniela. Lucky girls (and their "posse") will be spending 2 weeks in a beach town called Sperlonga, making side trips to Rome, Florence, and other places I will hopefully see someday myself (come on, Publishers Clearing House!).

The bridal shower was held earlier this month at a gorgeous restaurant in lower Manhattan, and I was drafted (not unwillingly) to make the cake and help my daughter with the favors, which were cookies shaped like little wedding cakes.

This was the cake. It was a yellow butter cake filled with Cannoli Cream filling. It's covered with buttercream. The pearls around the base of the tiers are made of fondant, and the flowers (detail below) are made from sugar paste. Oh, and this is the last cake I baked in my old oven, if you've seen the post from earlier this month. It was delicious, if I must say so myself!


Tuesday, June 23, 2009

Soggy — It’s the New Black

It was a dismally rainy spring here in the New York area. It feels like there haven’t been more than a handful of days in the last couple of months that I didn’t need to carry an umbrella with me. It’s really taken a toll on people’s spirits, I think.

umbrella-sunshineAnyhow, I decided that my new PTI Scattered Showers stamps would be a perfect match for the adorable It’s Raining, It’s Pouring paper collection (Piggy Tales) from i {heart} papers, to make a card to brighten someone’s day.

I paper-pieced the umbrella using one of the patterns in the collection, and cut the piece out with some Circle Nestabilities (on SALE!!). After mounting it on a couple more circles, I used my craft knife to cut a slit in the umbrella stick so I could slip some of the yellow silk ribbon through. The sentiment is cut out with the Ribbon Tags Nestabilities (also on SALE!!) and airbrushed a little to brighten it up.

Want to brighten up YOUR day? Go check out ALL the stuff that Kate has on sale at i {heart} papers!!!

Carolyn

Monday, June 22, 2009

Some Wine With That Cake?

Well, now I can reveal that THIS is what has been keeping me busy for the last couple of weeks. My youngest brother turns 50 this October, but he lives in California so the whole family won't be able to celebrate with him then. Since he and his family came for a visit east this week, we surprised him with an early birthday party yesterday. Yes, it's very early, and yes, we are kind of a strange family. This is the cake I made for the occasion, and yes, it is 100% edible. Even the wine bottle is made of cake!

The box the the bottle is resting on is the main cake -- butter cake with cannoli cream filling. The drape is fondant, sprayed with an edible pearl finish. The crate was made of fondant (a couple of weeks ago so it could dry hard), and then painted with food coloring to simulate a wood finish.

I created a stencil and used an edible cake decorating marker to get the words on the side of the crate. The grapes and poppies are also made of fondant, or a combination of fondant and gumpaste -- all edible (except for the wires in the flower stems!).

I created a custom label in Photoshop, using a picture of his house, and sent it off to be printed with edible ink on edible paper. I adhered the paper to some thinly rolled white fondant and cut it out before applying it to the bottle. The photo below was taken before I painted the edible gold onto the top of the bottle and placed it in the crate.
It was a lot of fun to make this one, and truly a labor of love!

Sunday, June 21, 2009

Carolyn has 2 Dads

Yeah, well kinda. A dad and a step-dad. Both are very important parts of my life. I confess (since neither of them reads my blog) that often I make the same Father’s Day card for both of them, since they’ve never been at the same place on Father’s Day, and have never been to each other’s homes. But this year, due to some unusual circumstances (to be discussed in another post), we’ll all be together today. So, 2 different cards were in order.

dad-fd This one’s for my Dad. I pretty much totally CASE’d it from Debbie Olson’s card. I used some of my delicious Wisteria paper and Glazed Brads (both available at i {heart} papers), and the PTI Star Prints stamp set. The ink and card base are SU! Elegant Eggplant.


george-fd

This one’s for George, my step-dad. It’s CASE’d from Mary Fish’s card. See, I’m having creativity issues these days – at least as far as cards are concerned. This uses all Stampin’ Up! supplies (wow, haven't said that in a while!) except for the little adhesive stars, which I can’t remember where I got.

Hope you and yours have a wonderful Father’s Day. I’m off to a family gathering that you will definitely hear more about later (or tomorrow).


Carolyn

Tuesday, June 9, 2009

Marrakech Butterfly

marrakech-butterfly

Can one ever have too many birthday cards? I think not! So I’m building my stash for the second half of this year.

Here’s a conundrum I’ve been having lately. Tell me if this happens to you: I go searching through my stash of birthday cards, pick one out for the upcoming occasion, and then stop because I can’t remember what I gave that person last year. What if it was the same card?!!! Because sometimes when I make a card I really like, I make 2 or 3 of them. And so I end up NOT using a card from my stash, and making a brand new one just in case.

Anyhow, back to this card. I used Julee’s Mojo Monday Mojo90SketchSketch #90. And as you can see, I took the sketch quite literally! It’s such a great layout for a focal image, and it just begs for gorgeous paper.

I was struck by how well this piece of Marrakech paper worked with the stylistic shape of the butterflies from the Flutter Bitsy set. I colored it with matching Copic markers, but what you can’t see in the photo is that I went over the entire butterfly with my clear Spica glitter pen. It gives it the most beautiful, yet understated, shimmer!

The greeting is from a fabulous little set called Happy Greetings. I just LOVE the font in this set. It’s a Sparkle Clear set from Hero Arts, and it comes with its own bunch of bling! I didn’t use that bling on this particular card, but I did use the bling that came with another Sparkle Clear set, Mushrooms.

Oh, did I mention that EVERTHING you see in this card, with the exception of the black and white cardstock, is available from Kate at i {heart} papers?

What I used:
Stamps:
Flutter Bitsy, Happy Greetings
Ink: Palette Noir
Paper: Marrakech 6x6 pad, PTI White, SU Black
Other:
Nestabilities, bling from Mushrooms set, Spica pen

Enjoy!

Carolyn

Friday, June 5, 2009

If you think these CUPCAKES are depressed…

busted I just had to shell out $500 for a new oven! Yup, last night my oven just up and died on me. I’m not really sure what happened, but at least it waited until after I had baked the 4 layers I needed for tomorrow’s bridal shower cake! I had some leftover batter, so I threw it into a cupcake pan and figured I’d bring them into work today. When I went to get them out, I found them like this. So sad. There was a metal wire/cable thingie dangling from the roof of the oven, with it’s end stuck in one of the cupcakes. See the third one in the top row? That’s where the wire was stuck.

I don’t know exactly how old the oven is, since it was here when I bought the apartment. But if I go by the revision date on the manual (1988), this baby has put in it’s 20 years and is ready for retirement. No sense in trying to fix it. And yes, that is an old and well-loved muffin pan.

Anyhow, just thought I’d share my misery with all of you. I’ve been busy all week doing the prep work for this cake, but I’ll post a picture of the finished cake tomorrow night.

Carolyn